Asterisk is open source software that allows you to create and manage telecommunications systems, including PBX and other voice communications applications. Asterisk is used to build telecommunications systems of various sizes, from small companies to large enterprises. Thanks to its open nature and rich feature sets, it is a popular tool in the field of telecommunications and VoIP. It can be installed on various distributions of operating systems based on the Linux kernel, such as Debian, Rocky, CentOS 7, CentOS Stream 8 or Ubuntu. Click on the appropriate links above to see how to install on other Linux systems.
1) Ubuntu installation
I’m assuming you have a server where you can run the Ubuntu installer. I use the free Proxmox software and downloaded an image of the Ubuntu operating system adapted to this environment. On our blog, in the post about installing Rocky 9 on Proxmox you can see how it is done.
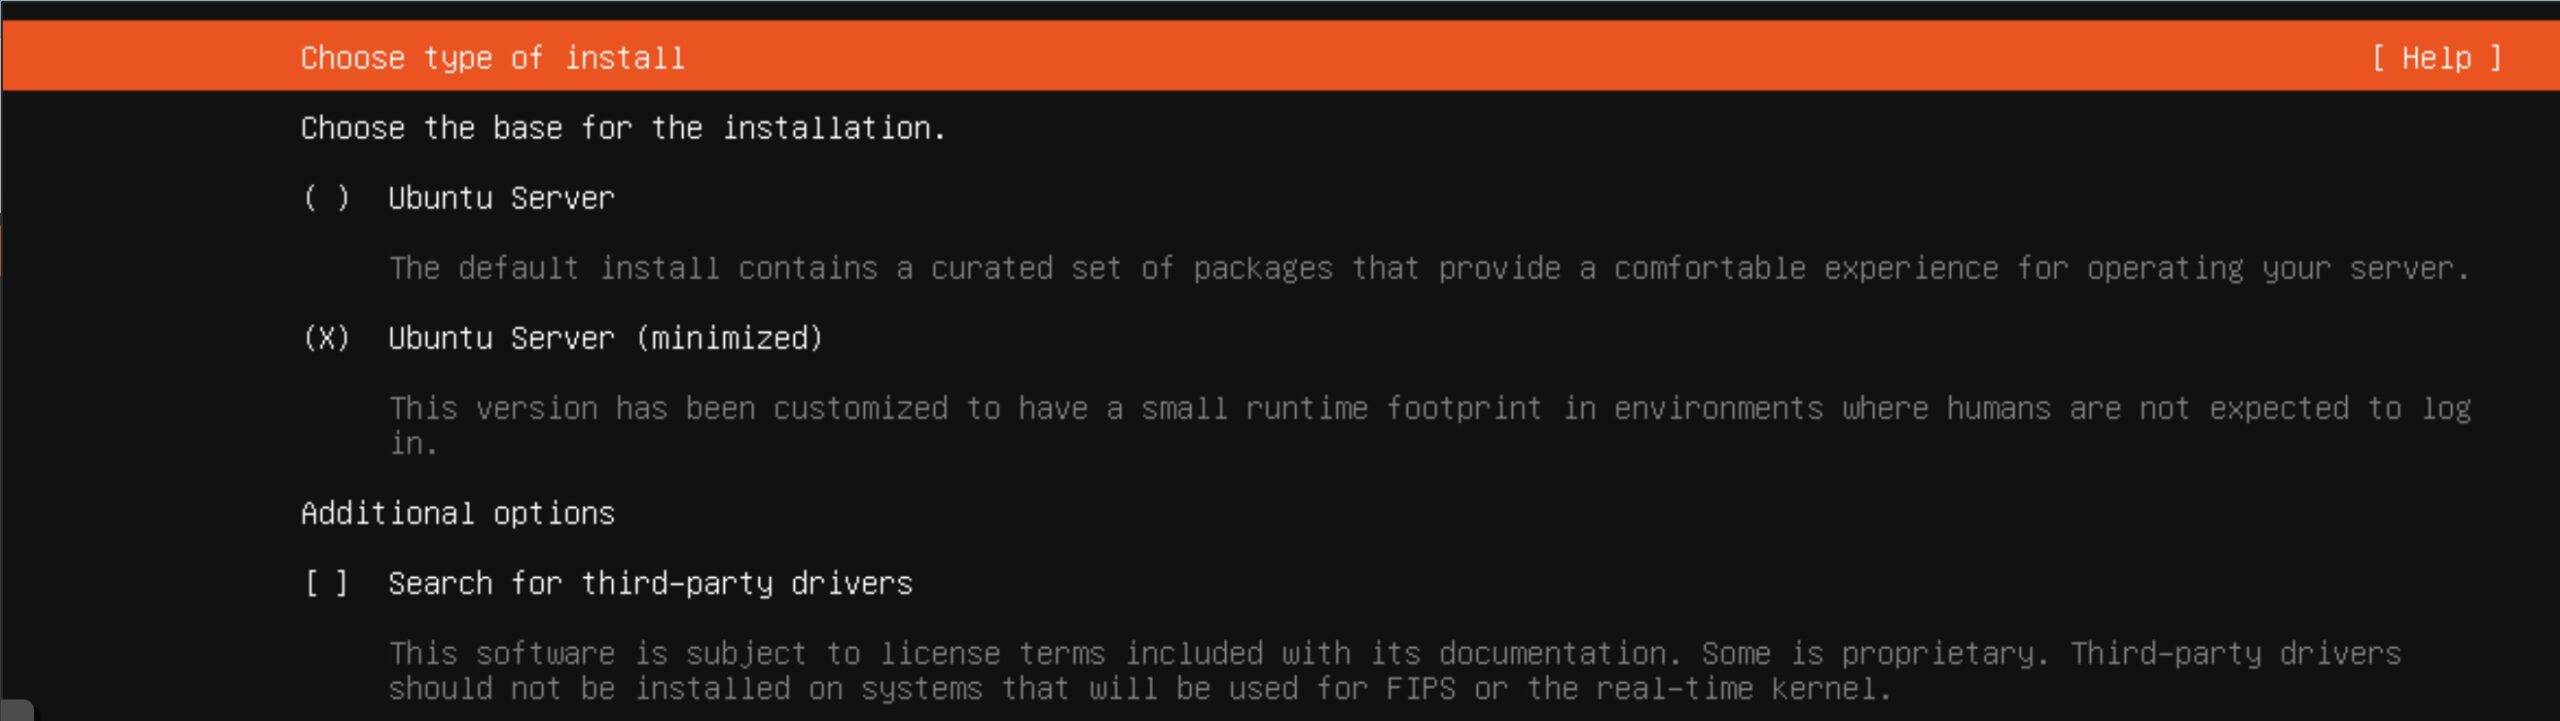
After my server with the mounted system image starts and the installer runs, I select installation language (English) and, importantly, I decide on minimum server version. (minimized)
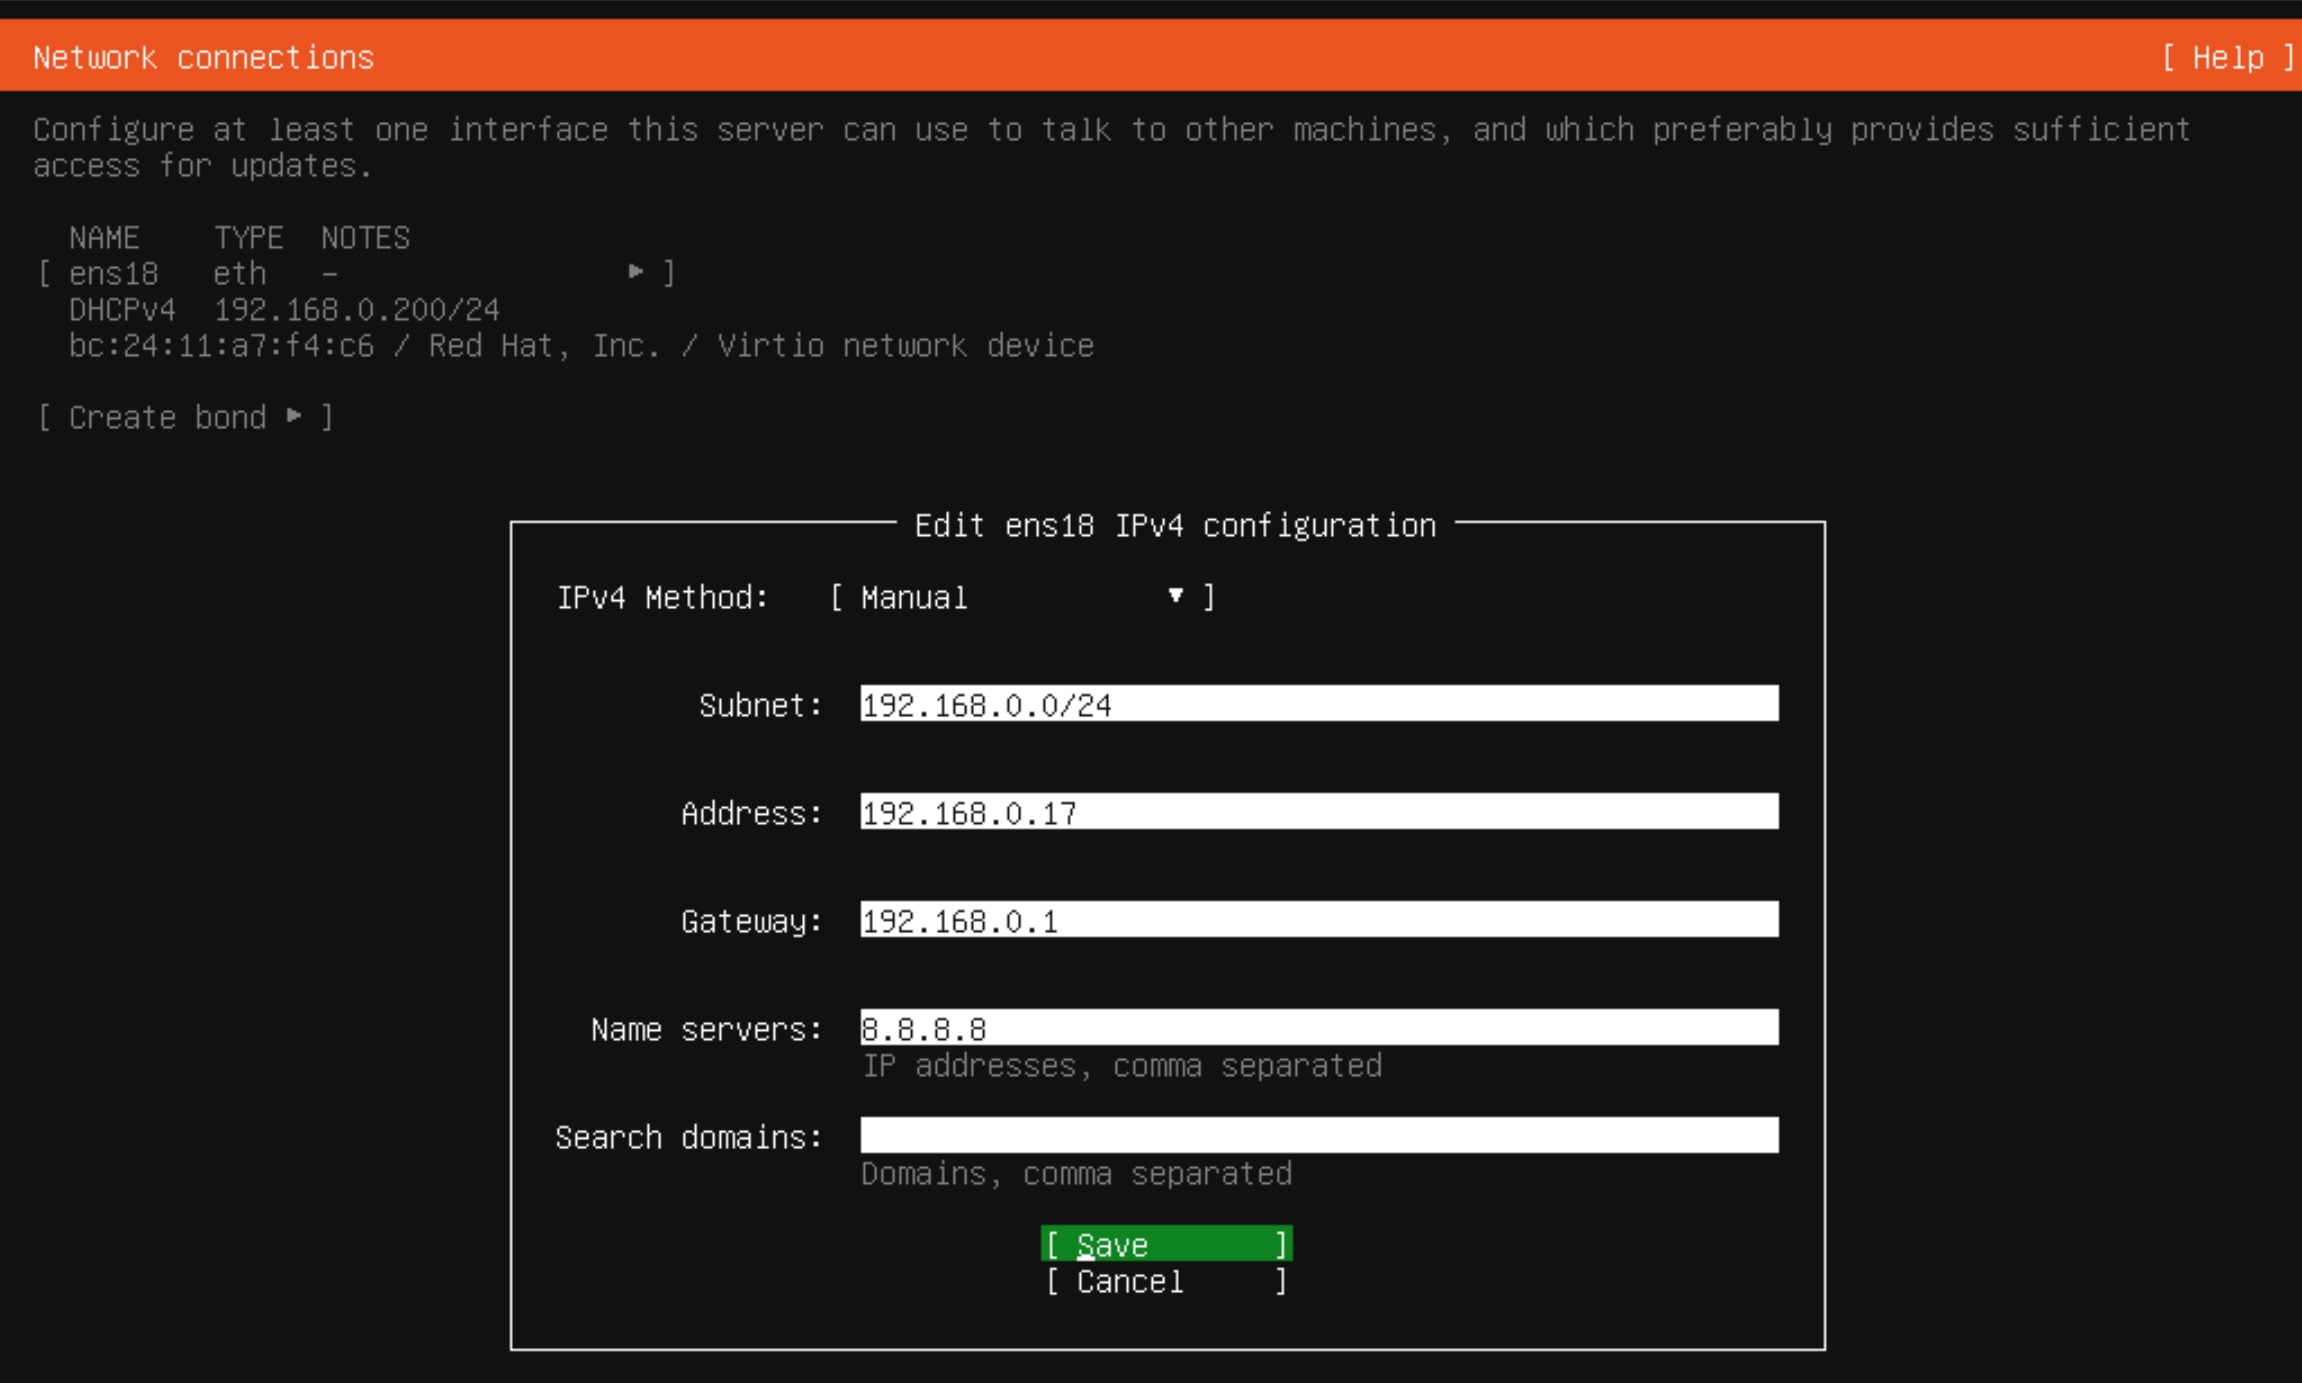
In the next step, we will proceed to network configuration. Click on the selected ens18 interface and select the IPV4 type and manual mode. We enter the subnet we are in, the IP address reserved for us, the default gateway and DNS server. As usual, I enter google servers 8.8.8.8 here and click Save and then Done at the bottom
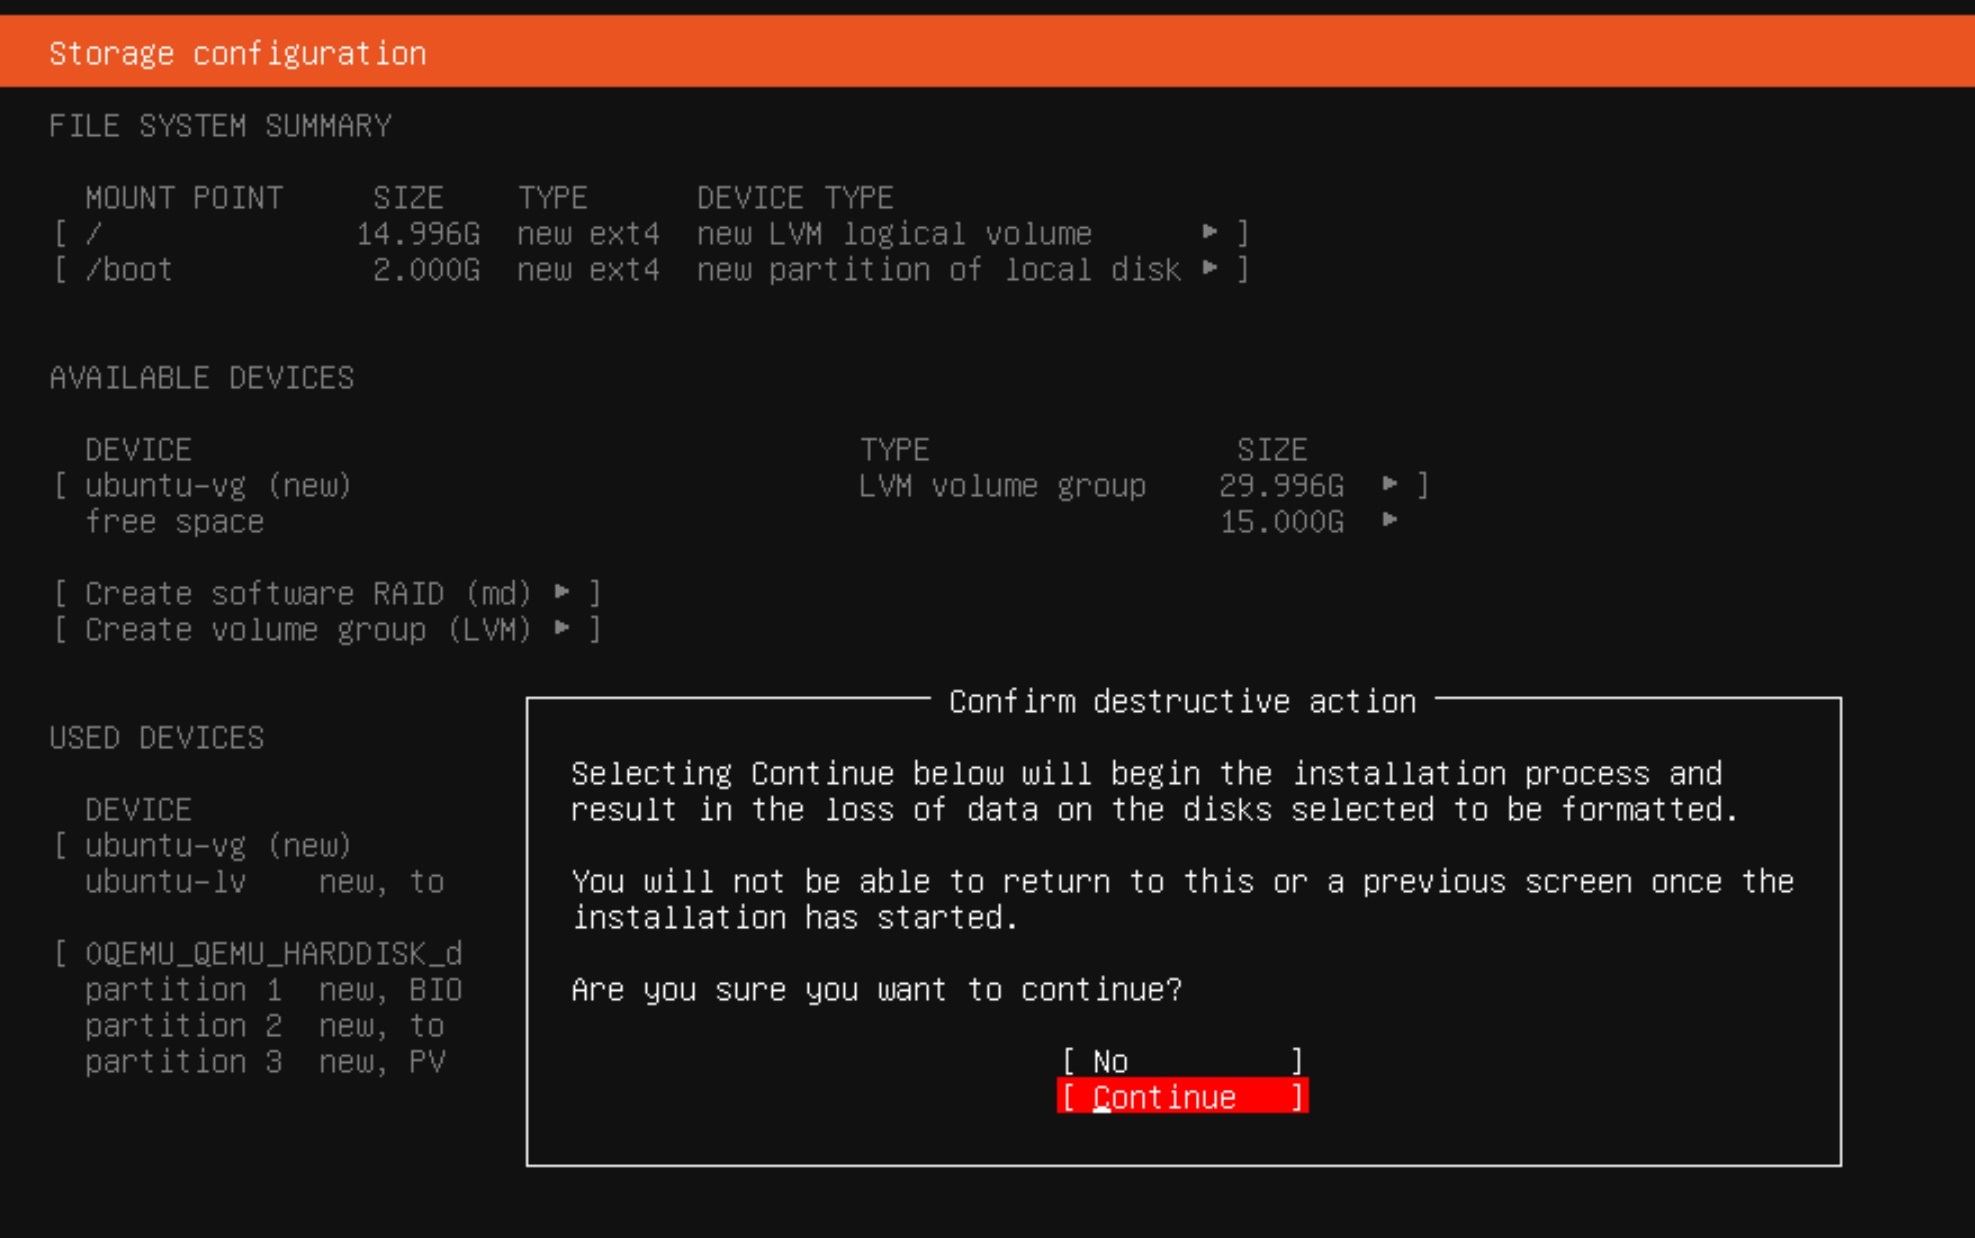
Next, we skip entering Proxy. In the next step, the installer will check the availability of packages on the archive server of the Ubuntu software. On the next screen, we can stay with the default disk space configuration option. (Guided storage layout) Without changing anything in the proposed settings, click Done and agree to the terribly destructive destruction of the existing disk space by clicking Continue.
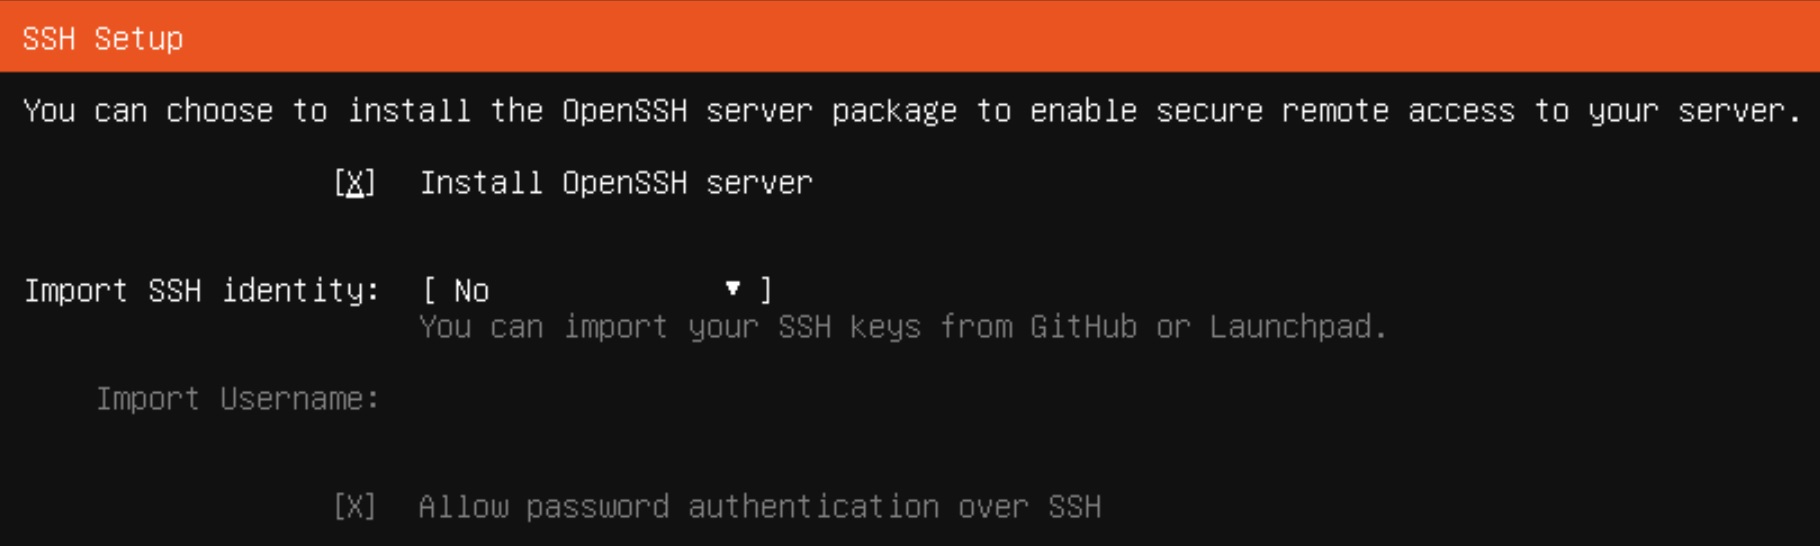
In the Profile setup tab, enter your data, including the server name, user and password. This is an important step because you will not be able to log in as root, only as the user you will now create. The next step SSH Setup is also very important. Select OpenSSH installation if you want to log in via SSH. You can also import your SSH key at the same time.
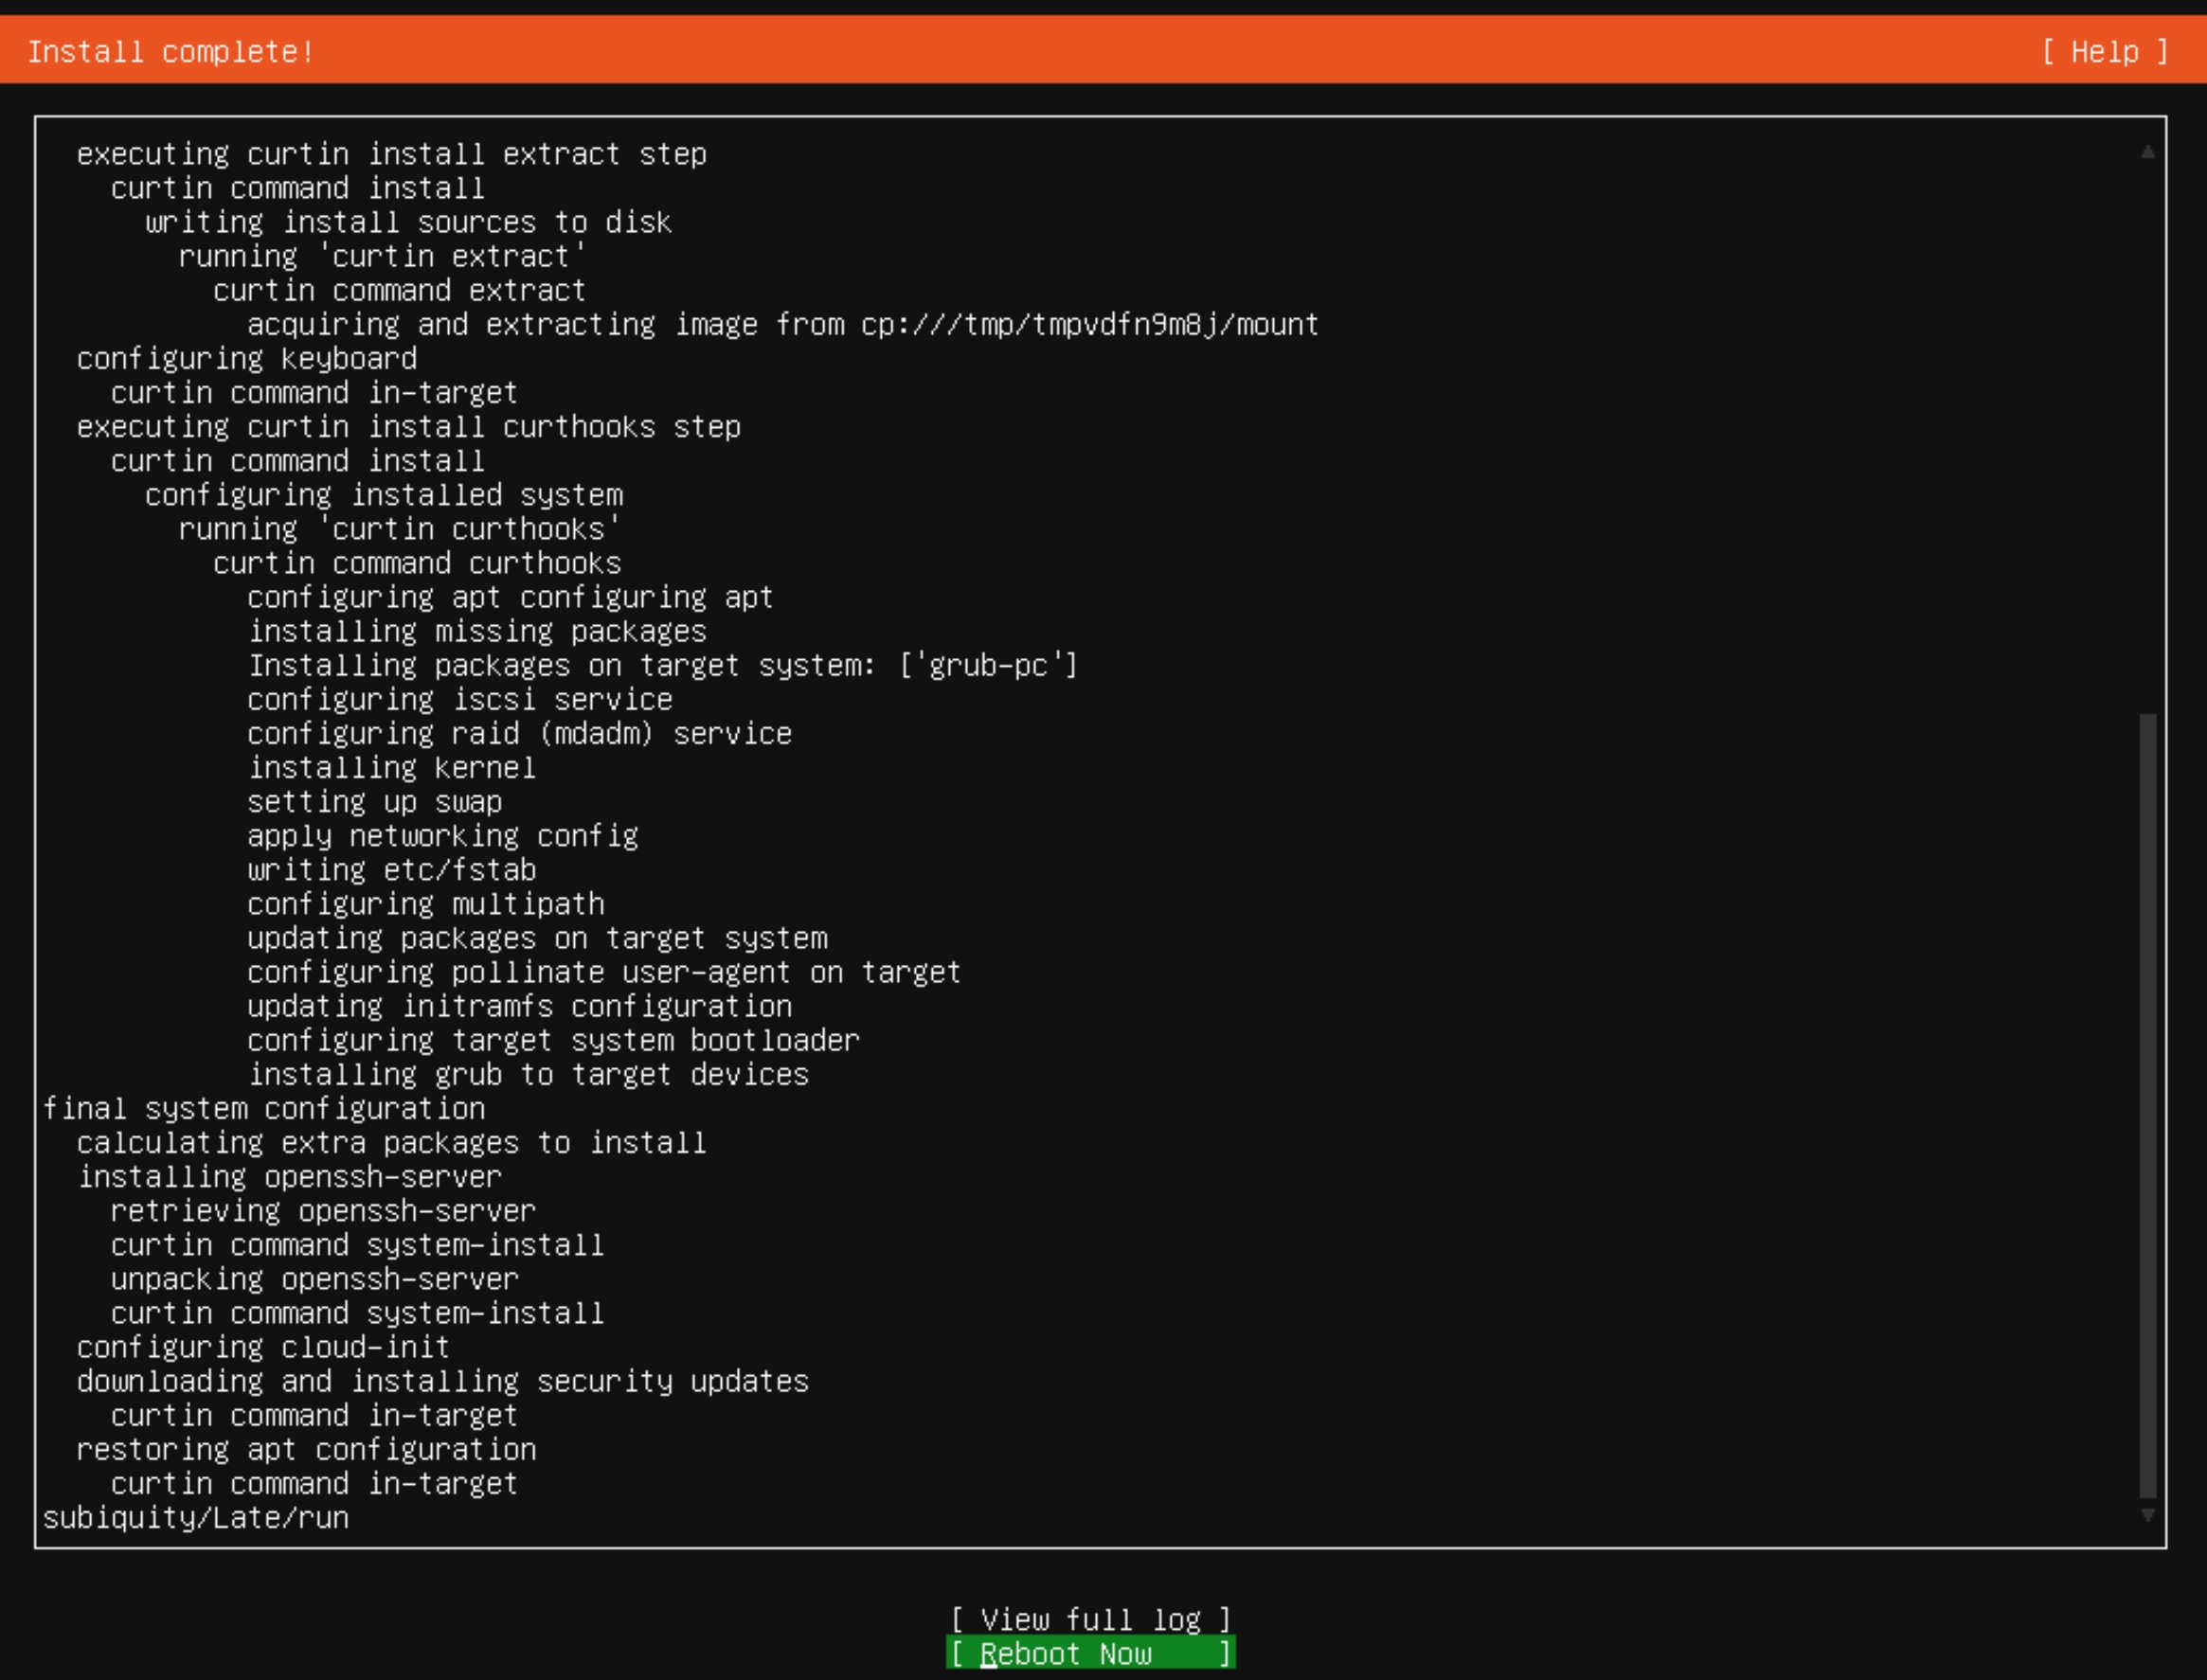
On the next Featured Server Snaps screen, we skip the additional software and the installer moves on to its main work. When the system installation is completed, the inscription Reboot Now will appear, and in the red status bar the inscription: Install Complete! Let’s first unmount our disk with the operating system image and restart the system.
After restarting, you will be able to log in as your previously created user, because logging in directly to the root account is blocked. From now on, instead of using Proxmox’s console, I will use the convenient putty terminal to easily copy and paste commands.
After logging in again, run the sudo command. Your user is in the sudoers group by default, so after a while you will be on the root account with full privileges.
sudo -iBefore installing Asterisk, we will update the Ubuntu operating system itself. At the same time, we will install a convenient nano text editor. The wget and tar applications for downloading and unpacking the asterisk installer are already shipped with the system. Instead of the yum command in ubuntu, we use the apt command to perform the installation.
apt update
apt upgrade
apt install nano
2) Downloading and unpacking the Asterisk software
Hint
Instead of following all the instructions below, you can also use our installer file which installs Asterisk 20 from source. INSTALLER FILE
Go to the directory where we will deal with the installer files and download Asterisk from its official website.
cd /usr/src
wget http://downloads.asterisk.org/pub/telephony/asterisk/asterisk-20-current.tar.gz
Unpack the installer, remove the source file.
tar zxvf asterisk-20-current.tar.gz
rm -rf asterisk-20-current.tar.gz
3) Installer configuration
Now go to the folder with the files for installation.
cd asterisk-20*/First, we will execute the install_prereq script in the contrib/scripts directory in the Asterisk repository. This is a tool for installing dependencies and libraries required to compile and run Asterisk. The “install” action will perform many operations, such as:
- System Update: The script can check for OS updates and, if necessary, update the system before installing dependencies.
- Installation of compilation tools: The script can install development tools and compilers that are necessary to compile Asterisk, such as GCC (GNU Compiler Collection), make, etc.
- Installation of libraries and dependencies: The script can install various libraries and dependencies that are required to compile and run Asterisk. These may be libraries for audio support, VoIP protocols (e.g. SIP), database support, etc.
- System Configuration: The script can also perform some system configurations, such as setting the Linux kernel or environmental parameters.
contrib/scripts/install_prereq installNow we can configure the asterisk for the final compilation. The configure script helps you tailor the compilation process to your specific system configuration. These are the main functions of ./configure:
- Dependency detection and checking:
configureanalyzes your system configuration and tries to detect dependencies and libraries that are needed to compile the software. This helps ensure that the software will run correctly on your system. - Configure build options: The
configurescript allows you to customize build options to suit your needs. For example, you can specify where the software should be installed, enable or disable certain features, set various configuration parameters, etc. - Generating configuration files:
configuregenerates configuration and header files that are used by the build process. These files contain information about system configuration and build options, which are then used by build tools (e.g. make). - Feature and module availability check:
configurecan check the availability and compatibility of various software features and modules depending on your specific requirements. For example, if a certain feature is optional and can be disabled,configureallows you to adjust the configuration to include or exclude that feature.
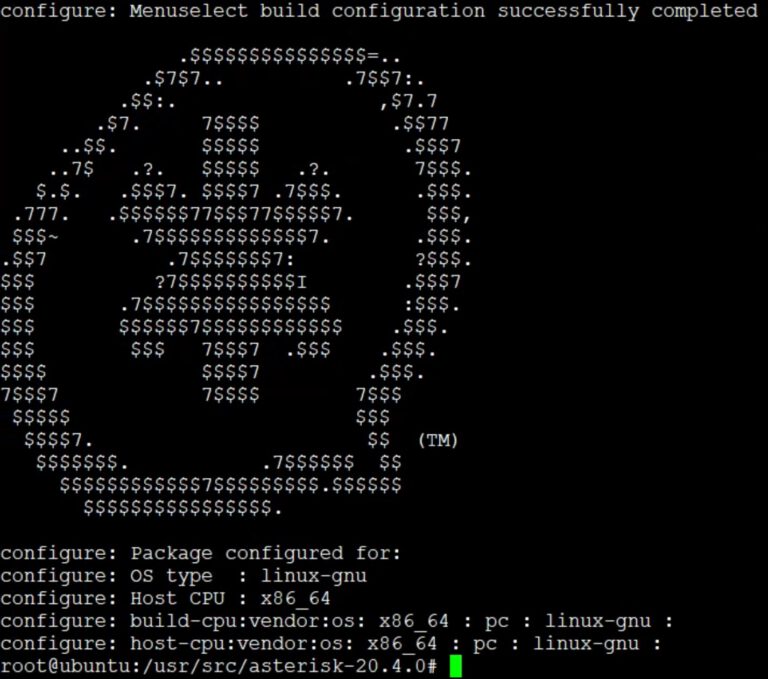
./configureIf the software configuration is completed without errors, we will see the asterisk system logo.
4) Compilation and installation
If we want to be able to select additional options, functions, applications, codecs, I suggest using the make menuselect command first. It will display a menu where you can select what you need.
make menuselect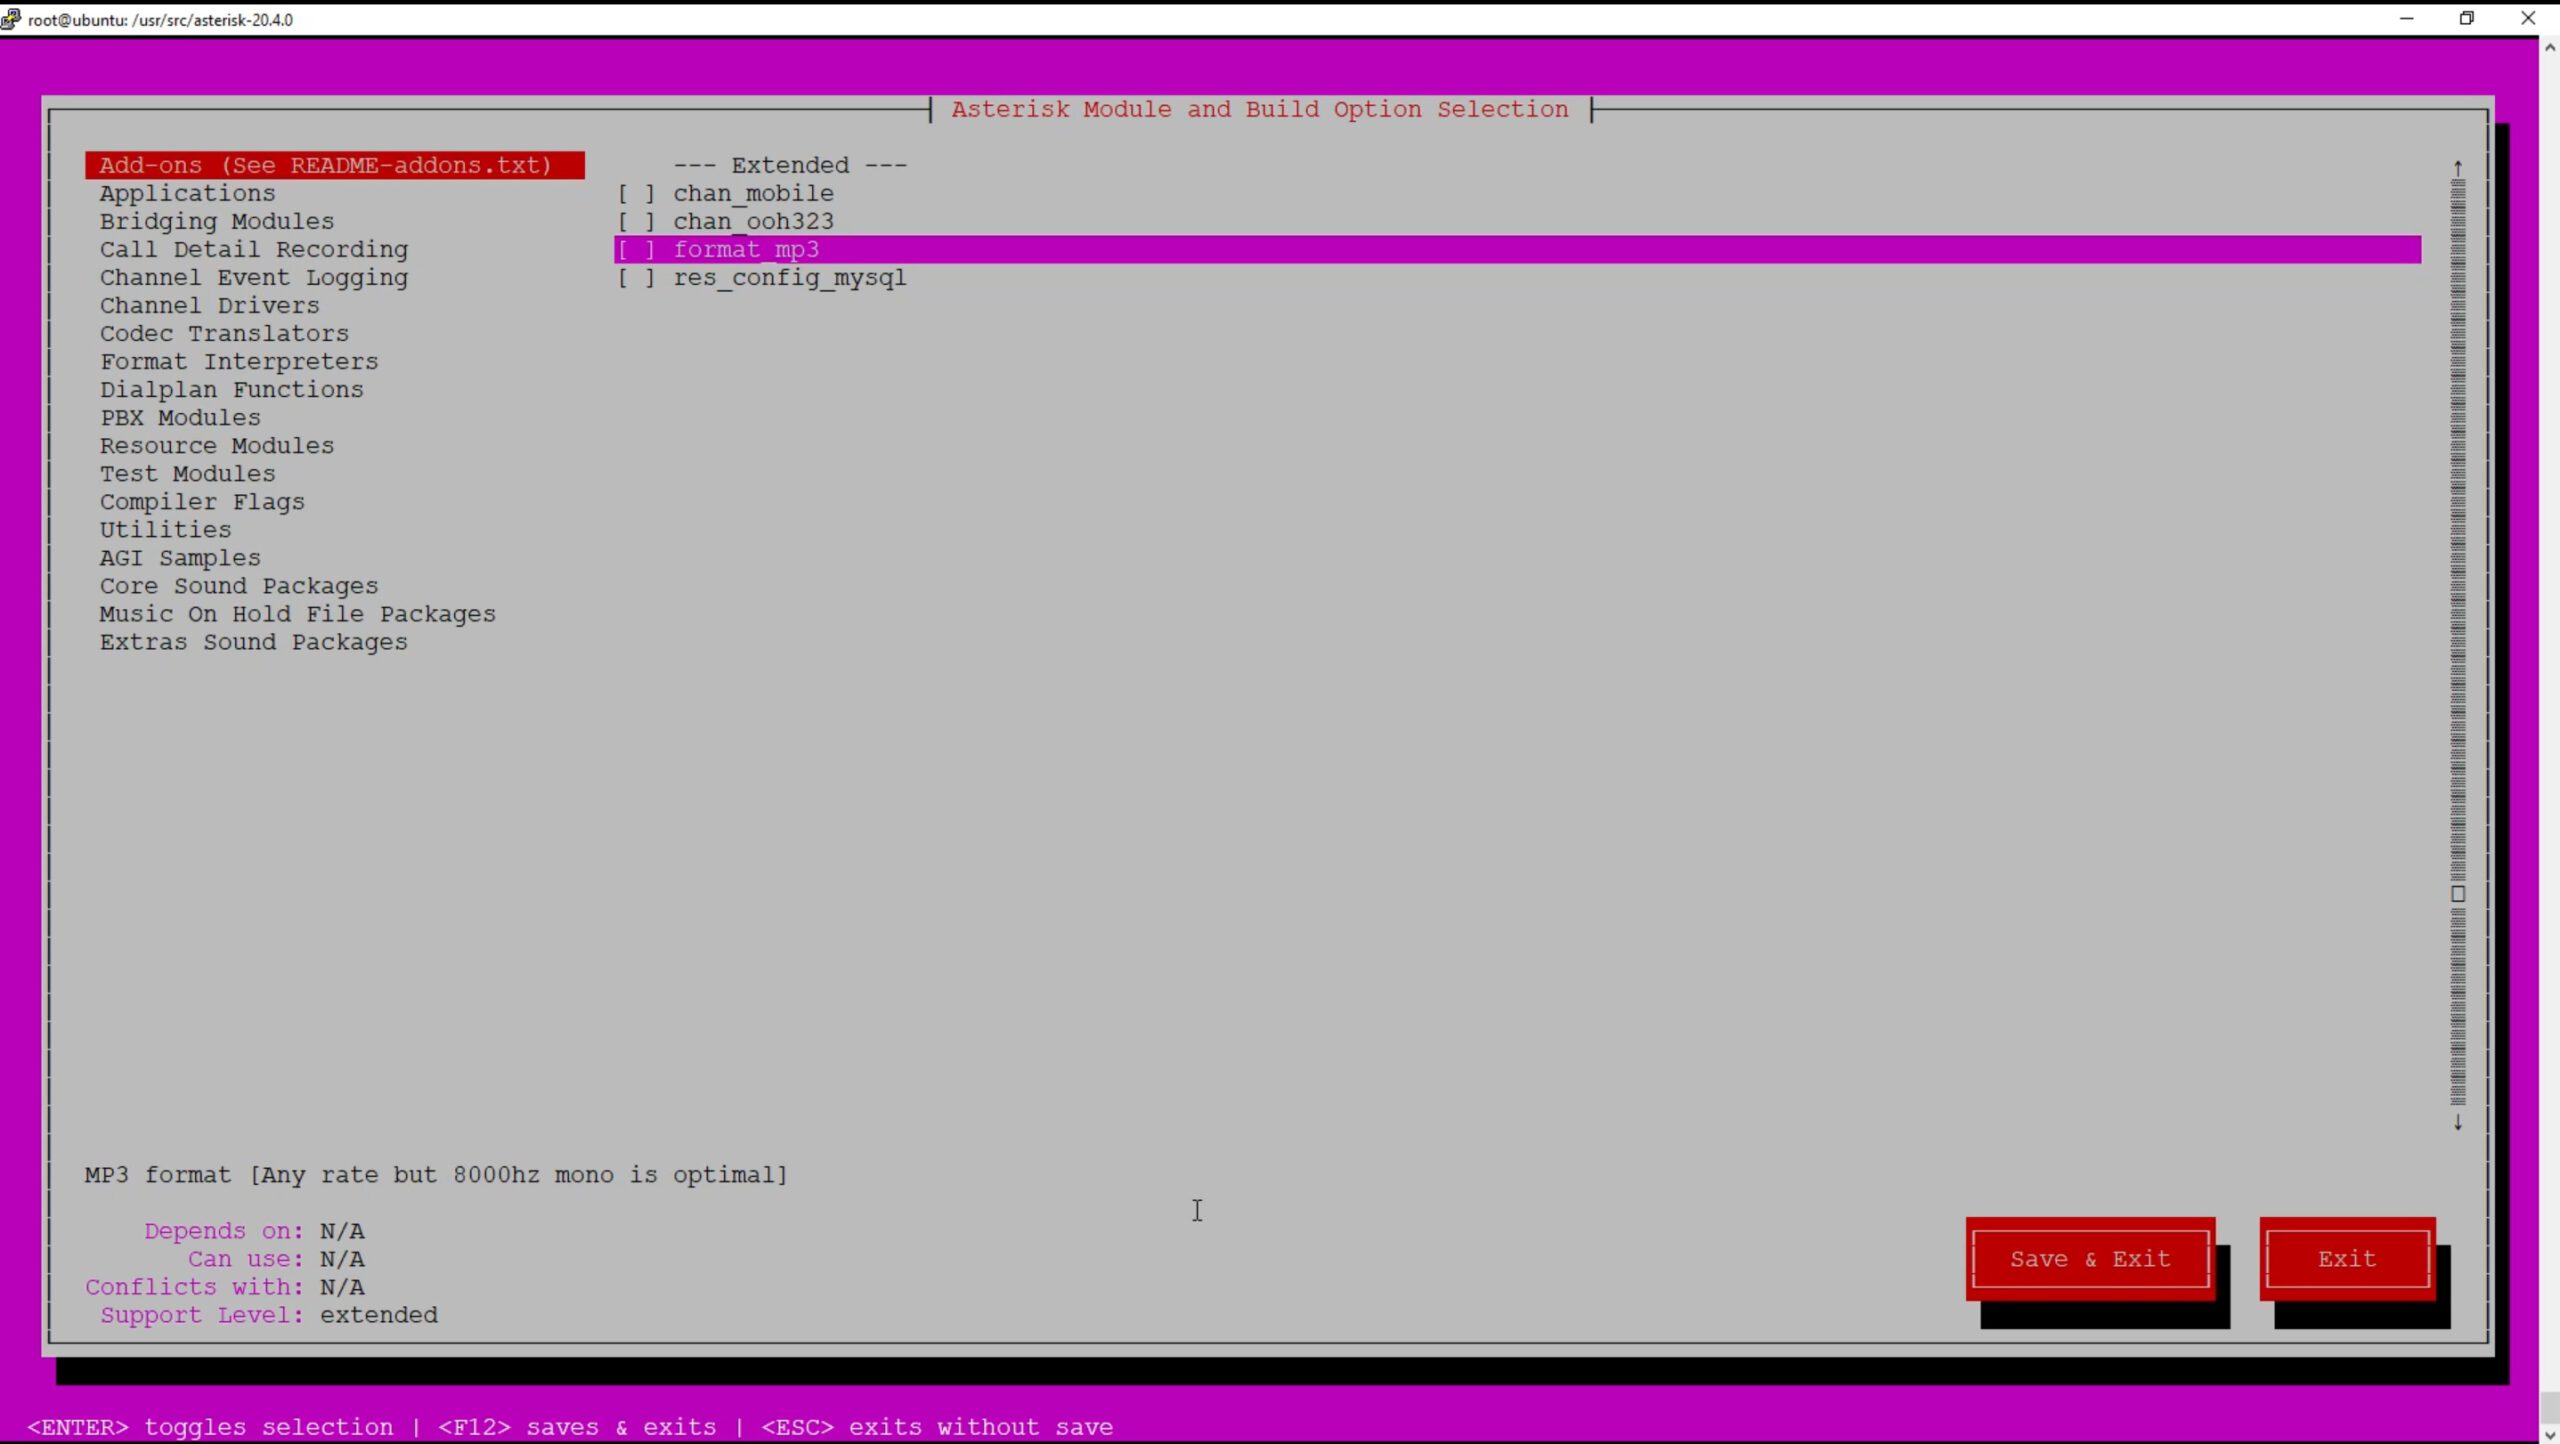
For example, we will select format_mp3 above. When leaving, of course, select Save&Exit. After selecting the appropriate options and dependencies, execute the make command itself. It will prepare the system for proper installation, which may take a few minutes.
makeWe will now run the get_mp3_source.sh script located in the contrib/scripts directory. It will download MP3 sources and the necessary libraries to support the MP3 format. It works as follows:
- LAME sources: The script downloads the sources of the LAME utility, which is used to encode and decode MP3 audio files.
- Download MAD Sources: MAD (MPEG Audio Decoder) is a library used to decode MP3 files. The script downloads MAD sources.
- Source Compilation: After downloading the LAME and MAD sources, the script compiles these libraries.
- Library installation: Once compiled, the script installs the libraries on the system. This allows Asterisk to use these libraries when handling MP3 audio files.
MP3 is a copyrighted format, so sources and libraries for its support are not provided with Asterisk.
contrib/scripts/get_mp3_source.shIt’s time to properly install the asterisk. You must invoke the make command with the install parameter
make installAfter successful installation, we will receive a window with information similar to the one below.
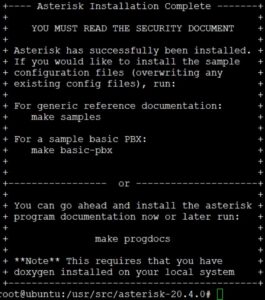
Now we will generate sample system files using the make samples command.
make samplesWe will move the generated files to a new folder (e.g. /etc/asterisk/samples/) and create a basic system configuration using make basic-pbx.
mkdir /etc/asterisk/samples
mv /etc/asterisk/*.* /etc/asterisk/samples/
make basic-pbx
Our Asterisk system is now ready, although there is no information about it on the main screen. We still need to generate the startup files using make config.
make config5) Starting Asterisk
If we want asterisk to start automatically with our operating system, we must add it to the autostart.
systemctl enable asteriskNow let’s start our phone system and check its status.
systemctl start asterisk
systemctl status asterisk